You take a clean entry off a level. Price snaps away, races up four candles almost without pausing, and you sit there wishing you had been in for the whole run. Then, an hour later, price drifts back down into the middle of that fast move, pauses at a spot that looks like nothing special, and takes off again.
That “spot that looks like nothing” is often a fair value gap, and once you can see them, that pullback stops looking like luck.
By the end of this guide you will be able to spot a valid fair value gap by eye, know exactly what a fair value gap indicator is doing for you, and have a simple, risk-first way to trade one without pretending it is a magic buy button.
Key Findings
- An FVG is an imbalance, not a signal: it marks where price moved so fast that one side barely traded, leaving a gap the market often revisits later.
- It is a three-candle pattern: the gap sits between the wick of the first candle and the wick of the third, spanned by a large middle candle.
- An honest FVG zone does not move: the three candles have already closed, so a well-built indicator locks the zone rather than redrawing it.
- The edge is in the reaction, not the gap: the setup only becomes tradeable when price returns to the zone and shows it is defending the level.
What is a fair value gap?
A fair value gap is a three-candle imbalance. Price moves so hard in one direction that the middle candle leaves a gap between the candle before it and the candle after it. In an up-move, the high of the first candle sits below the low of the third candle. Nothing traded in that space. The market skipped it.
Why does that matter? Because markets tend to be thorough. When price rips through an area without letting buyers and sellers transact properly, it often comes back later to do that unfinished business before continuing. Traders call the empty space “inefficient,” and the pullback into it a chance to enter at a fairer price than the crowd who chased the initial move.
This is not a brand-new idea dressed up in new language. Investopedia’s guide to price gaps (2024) describes a gap as an area on a chart where price jumps sharply with little or no trading in between, and notes that such areas frequently draw price back to “fill” them. The fair value gap is simply a precise, three-candle version of that older observation, framed around the imbalance a fast move leaves behind.
How do you spot a valid fair value gap?
Look for three candles in a row where the middle one is a strong, decisive move, and where the wicks of the outer two candles leave a gap between them. If the first candle’s high and the third candle’s low still overlap, there is no gap. The space has to be genuinely empty.
Not every gap deserves your attention, though. A few filters separate the ones worth marking from the noise:
- Size and context. A gap that appears during a sharp break away from a support or resistance zone means more than one that prints in the middle of aimless chop.
- Timeframe. A gap on the 4-hour chart reflects far more participation than one on a 1-minute chart. Higher timeframes give you fewer gaps, but the ones you get carry weight.
- Freshness. A gap that price has already returned to and reacted from has done its job. An untouched gap is the more interesting one.
A fair value gap indicator automates exactly this scan. It watches every set of three candles, checks whether the wicks leave a gap, and shades the zone for you so you are not squinting at the chart. That saves time and removes some of the “did I imagine that gap” second-guessing. What it does not do is tell you the trade is good. The tool finds the pattern. You still supply the context and the risk plan.
Does a fair value gap indicator repaint?
Short answer: a well-built one does not, and that is the whole point of using an objective, price-based pattern.
A fair value gap is defined entirely by three candles that have already closed. Once those candles are printed, the high of the first and the low of the third are fixed numbers. The gap between them cannot change, because the past cannot change. So an honest FVG tool draws the zone once and leaves it exactly where it is.
Compare that to a signal that quietly looks at future candles and slides its arrow to the perfect spot after the fact. We covered that trap in detail in the guide on non-repaint forex indicators. The reassuring thing about fair value gaps is that they are structurally honest. You can scroll back a week and the zones sit exactly where they printed in real time. If a tool ever moves or deletes a gap after its three candles have closed, that is a bug or worse, not a smart feature.
Fair value gap vs order block: which should you use?
This is where a lot of traders get tangled, because the two ideas describe the same institutional footprint from different angles.
| Aspect | Fair value gap | Order block |
|---|---|---|
| What it marks | The empty space a fast move left behind | The last opposing candle before that move |
| Core idea | Price skipped this area and may return | Orders were resting here before the push |
| How it is drawn | Zone between candle 1 and candle 3 wicks | Body or range of the pre-move candle |
| Best read as | Where price may find “fair” value again | Where the move was launched from |
| Fixed after candles close | Yes | Yes |
- Fair value gap
- The empty space a fast move left behind
- Order block
- The last opposing candle before that move
- Fair value gap
- Price skipped this area and may return
- Order block
- Orders were resting here before the push
- Fair value gap
- Zone between candle 1 and candle 3 wicks
- Order block
- Body or range of the pre-move candle
- Fair value gap
- Where price may find “fair” value again
- Order block
- Where the move was launched from
- Fair value gap
- Yes
- Order block
- Yes
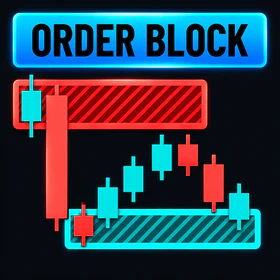
Neither one is “better.” The order block shows you the launch pad; the fair value gap shows you the vacuum the launch created. In practice the strongest areas of interest are where the two overlap. When an order block sits right against a fair value gap, you have two independent reasons pointing at the same price. If you already mark supply and demand from the order block versus supply zone guide, fair value gaps slot in alongside that reading rather than replacing it.
How do you actually trade a fair value gap?
Here is the part that keeps accounts intact: a fair value gap is a place to look, not a reason to click buy. The gap tells you where price might return. It says nothing about whether it will hold.
A calm, repeatable approach looks like this:
- Mark the gap on a higher timeframe where it carries real weight.
- Wait for price to return into the zone. No return, no trade. You are not chasing.
- Look for a reaction inside or at the edge of the zone. A firm rejection candle, a shift in momentum, a smaller-timeframe structure break. Something that shows the zone is being defended.
- Define risk first. Your stop goes on the far side of the gap, where the idea is clearly wrong. Size the position so that stop costs you a small, fixed slice of the account, not a scary one.
- Have a target before you enter, whether that is the next opposing zone, a prior high, or a set reward multiple of your risk.
An indicator cannot fix poor risk management. It sharpens your timing and tidies your chart, and that is genuinely useful, but the discipline around the entry is still yours to own. A fair value gap that lines up with the trend, with a nearby order block, and with a clean reaction is a far better prospect than a lonely gap floating against the trend. Context is the multiplier.
Where RelicusRoad Pro fits
RelicusRoad Pro was built around the same principle that makes fair value gaps trustworthy: mark objective, price-based zones and lock them so your chart tells the truth after the fact. Its levels and confirmation signals are calculated at candle close and stay put, which is exactly the behaviour you want when you are reading imbalances and deciding whether a zone is holding.
The goal is not to hand you more arrows to chase. It is to give you a clean, honest map of where institutional activity left its footprint, so you can wait for price to come to your zone instead of forcing trades in the middle of nowhere. Read alongside your own fair value gap analysis, that context helps you filter which gaps are worth acting on and which are noise.
Frequently asked questions
What is a fair value gap in simple terms? A fair value gap is a three-candle pattern where the first candle’s wick and the third candle’s wick do not overlap, leaving a gap that the big middle candle raced through. It marks a spot where price moved so quickly that one side barely got to trade, which often pulls price back later to fill that unfinished business.
Does a fair value gap indicator repaint? A well-built one does not. An FVG is defined by three candles that have already closed, so once those candles are printed the gap is fixed. If a tool keeps moving or deleting a gap zone after its candles have closed, that is a red flag, not a feature.
What is the difference between a fair value gap and an order block? An order block is the last opposing candle before a strong move, so it points to where orders were sitting. A fair value gap is the imbalance left behind by that same move. One shows the launch pad, the other shows the vacuum it created. Traders often mark both and look for spots where they overlap.
Do all fair value gaps get filled? No. Many are revisited, but plenty are never fully filled, especially in a strong trend where price keeps running. Treating an unfilled gap as a guaranteed target is a common and expensive mistake. It is a zone of interest, not a promise.
Which timeframe is best for fair value gaps? Higher timeframes such as the 1-hour, 4-hour, and daily produce fewer but more meaningful gaps, because a large imbalance there reflects real participation. Lower timeframes print far more gaps, most of which are noise. Many traders find the gap on a higher timeframe and refine the entry lower down.
Fair value gaps reward patience. Mark the zone, wait for price to come back, demand a reaction, and size your risk before you commit. Do that consistently and the chart starts to feel a lot less random.
See how RelicusRoad Pro maps institutional zones on your chart →
Keep going on this topic
Support and Resistance Mastery: Zones, Breaks and Retests
Master support and resistance zones with repeatable drawing rules, breakout and retest confirmation, invalidation, position sizing and common mistakes.
- Supply and Demand Indicators: How to Read Zones Without Guessing
- Institutional Forex Indicators: How Smart-Money Tools Differ From Retail Ones
- Renko Charts: Filtering the Noise for Pure Price Action
- Heikin Ashi: The Trend Smoother
- Head and Shoulders Pattern: How to Trade the Reversal Without Chasing Ghosts
- Double Top and Double Bottom Pattern: Trading the Reversal Without Guessing the Turn
- Cup and Handle Pattern: How to Trade the Breakout
- Wedge Pattern Trading: How to Read Rising and Falling Wedges
- Flag and Pennant Pattern: How to Trade Continuation Breakouts
- Rectangle Pattern: Trade the Range or the Breakout
- Hammer candlestick pattern: how to trade the reversal signal
- Doji candlestick pattern: what the indecision candle really tells you
- Morning star candlestick pattern: how to read the three-candle bottom
- Market profile trading: how to read value areas and point of control
- Break of Structure vs Change of Character: Which One Ends the Trend?
- Broadening formation: why breakouts keep failing inside a megaphone
Related reading: The Best Trading Indicators for MT4, MT5 and TradingView in 2026.