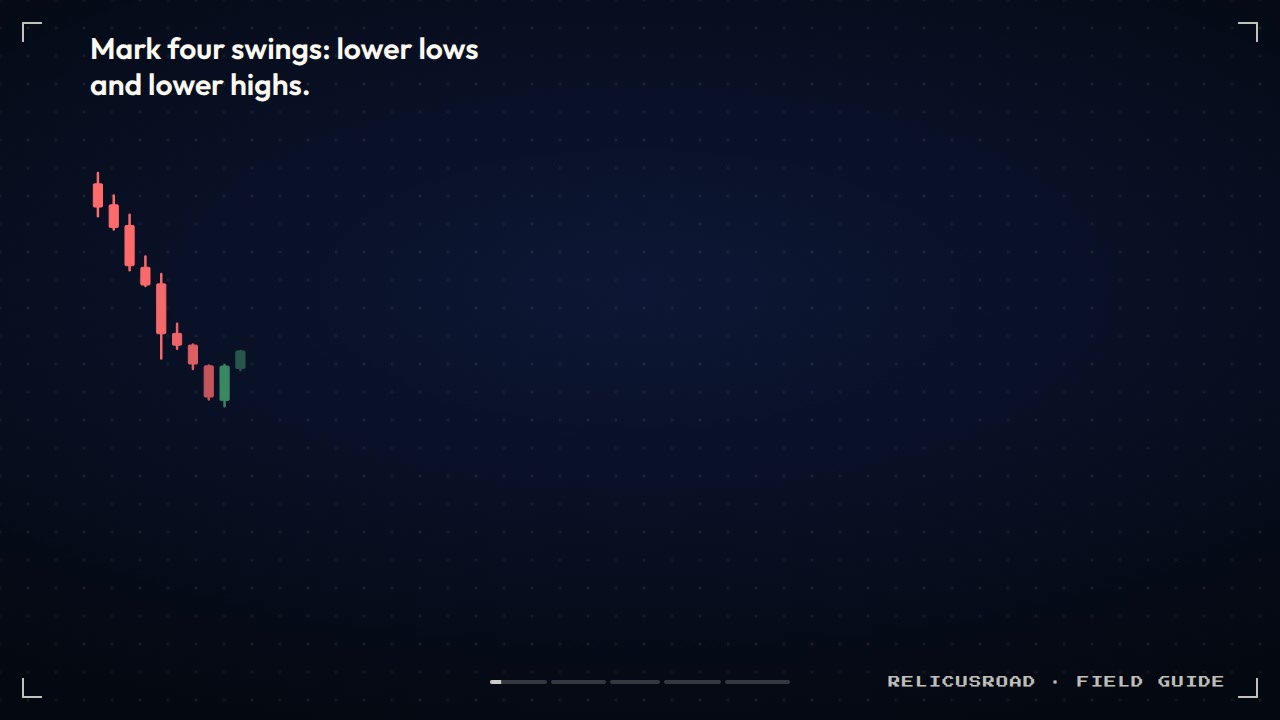
Price slid through the bottom of a wedge you were watching. You sold the break, and two candles later the market turned and ran straight back through your stop. On a Wolfe wave chart, that dip is point 5, the place where this pattern says to buy, not sell.
By the end of this guide you will be able to check whether five swings really make a Wolfe wave pattern, and you will know where the entry, stop and target go before price gets there.
Key Findings
- Five points, two narrowing lines: a Wolfe wave joins points 1 and 3 with one line and points 2 and 4 with another, and the two lines squeeze together.
- Point 5 is the entry: price pokes past line 1-3, then a candle closes back inside it, and that close is where you buy or sell.
- The stop sits a little past point 5: if price trades beyond that extreme, the turn you marked was not the turn.
- The target is a sloped line: line 1-4, drawn from point 1 through point 4, so the target price changes with every candle.
What is a Wolfe wave pattern?
A Wolfe wave pattern is five numbered swing points inside two lines that narrow toward each other. In a bullish wave, points 1 and 3 are falling lows and points 2 and 4 are falling highs. Point 5 is the last low, and it dips below the line from 1 to 3 before price turns.
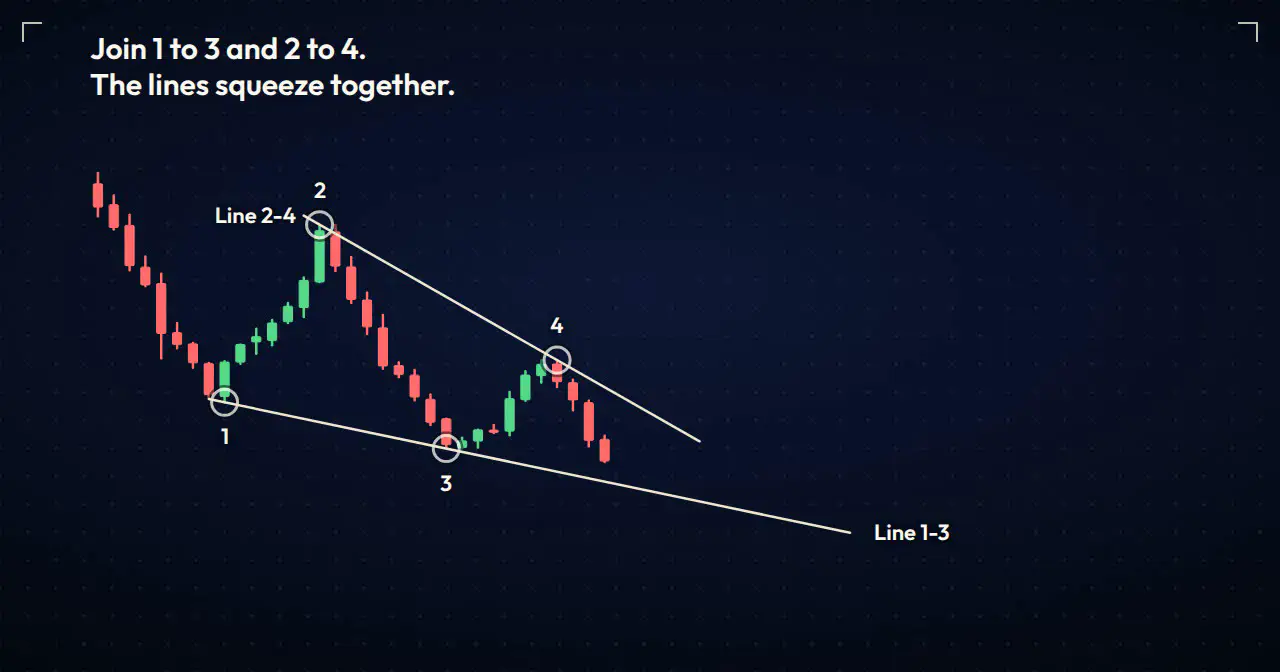
Both lines slope down, but line 2-4 falls faster, which is why they squeeze together. The narrowing is the warning: sellers keep pushing to new lows, yet each push covers less ground.
The pattern is credited to trader Bill Wolfe; Investopedia’s Wolfe wave entry sets out the same five-point structure. The bearish wave is the mirror image: rising highs at 1 and 3, rising lows at 2 and 4, and a point 5 that pokes above line 1-3.
| Bullish Wolfe wave | Bearish Wolfe wave | |
|---|---|---|
| Points 1 and 3 | Falling lows | Rising highs |
| Points 2 and 4 | Falling highs | Rising lows |
| Point 5 | Dips below line 1-3 | Pokes above line 1-3 |
| Trade | Buy the close back above | Sell the close back below |
- Bullish Wolfe wave
- Falling lows
- Bearish Wolfe wave
- Rising highs
- Bullish Wolfe wave
- Falling highs
- Bearish Wolfe wave
- Rising lows
- Bullish Wolfe wave
- Dips below line 1-3
- Bearish Wolfe wave
- Pokes above line 1-3
- Bullish Wolfe wave
- Buy the close back above
- Bearish Wolfe wave
- Sell the close back below
What makes a Wolfe wave valid?
Four checks, all of them yes. Point 3 must go past point 1. Point 4 must stay between points 1 and 2. The two lines must narrow. Point 5 must cross line 1-3 and then close back inside. Miss one and you have five swings, not a Wolfe wave.
The second check is the one most people skip. Point 4 has to stay above point 1 in a bullish wave. If it does not, line 1-4 slopes down instead of up, and the target can end up barely above your entry.
Where do entry, stop and target go?
Buy at the close of the candle that ends back above line 1-3, after the dip that made point 5. Put the stop a little below the point 5 low. The target is line 1-4, drawn from the point 1 low through the point 4 high and extended to the right.
Line 1-4 slopes, so the target price changes with every candle. On a bullish wave it usually rises over time. Many traders move a limit order along the line each session, or close the trade when a candle touches it. Some Wolfe traders also read the point where lines 1-3 and 2-4 cross as a rough time window for the move.
The bearish version runs the same plan upside down.
Notice that the sell line only appears after the point 5 candle closes back under line 1-3. The stop is close to the entry, which is the appeal of this pattern; the risk-reward ratio guide shows how to size a trade from that distance.
How is a Wolfe wave different from a wedge?
Same shape, earlier trade. A falling wedge and a bullish Wolfe wave both show two narrowing lines. The wedge pattern trader waits for a close through the upper line. The Wolfe wave trader buys at the bottom line, at point 5, and uses line 1-4 as the target.
| Wolfe wave | Wedge | |
|---|---|---|
| Entry | At point 5, near the near line | Breakout through the far line |
| Stop | A little past point 5 | Inside or beyond the wedge |
| Target | Line 1-4, sloped | Usually the wedge’s widest height |
| Needs | Exactly five swing points | Two touches on each line |
- Wolfe wave
- At point 5, near the near line
- Wedge
- Breakout through the far line
- Wolfe wave
- A little past point 5
- Wedge
- Inside or beyond the wedge
- Wolfe wave
- Line 1-4, sloped
- Wedge
- Usually the wedge’s widest height
- Wolfe wave
- Exactly five swing points
- Wedge
- Two touches on each line
Thomas Bulkowski’s Encyclopedia of Chart Patterns (2nd edition, 2005) catalogues rising and falling wedges as their own patterns, and his pattern site does the same. The Wolfe wave adds a numbered point 5 and a target line to that shape. If you count five legs and want to know why some traders label them as waves, the Elliott wave guide covers that separate counting method.
Why do two traders draw different Wolfe waves?
Because choosing the swing points is a judgment call. Pick a different candle for point 2 and both lines move, which moves point 5 and the target with them. That is the honest limit of this pattern: the geometry is exact, but the input is not.
The fix is to decide what counts as a swing before you look. For example, a swing low is a candle with two higher lows on each side. Apply the same rule every time and your Wolfe waves stop changing shape when you redraw them.
Where RelicusRoad Pro fits
A Wolfe wave lives or dies on where you put five points, so the levels you check those points against should not move after the fact. RelicusRoad Pro sets its support and resistance levels once a candle has closed and leaves them there, so a point 5 that lands on a level you saw yesterday is still on that level when you review the trade.
It does not number Wolfe waves for you. What it adds is a second opinion: if point 5 dips below line 1-3 right at a level that has held before, two separate reasons now point to the same turn.
Frequently asked questions
What is a Wolfe wave pattern?
A Wolfe wave is a five-point reversal pattern. In the bullish version, points 1 and 3 are falling lows, points 2 and 4 are falling highs, and the lines through them narrow like a wedge. Point 5 is the low that pokes below the line from 1 to 3. Traders buy near point 5 and aim for the line drawn from point 1 through point 4. The pattern is credited to trader Bill Wolfe.
Where do you enter a Wolfe wave trade?
At point 5, but only after a candle closes back on the inside of line 1-3. For a bullish wave, that means a close back above the line after the dip below it. Buying the first touch of the line, before that close, means guessing where point 5 will end.
Where does the stop loss go on a Wolfe wave?
Put it a little beyond point 5, below its low for a bullish wave and above its high for a bearish one. If price trades through that level, the swing you called point 5 was not the turn, so the trade idea is wrong and should be closed.
How do you find the Wolfe wave target?
Draw a line from point 1 through point 4 and extend it to the right. That is the line 1-4 target. Because the line slopes, the target price changes each candle, so many traders move a limit order along it or close the trade when a candle touches the line.
Is a Wolfe wave the same as a wedge pattern?
They share the same shape, with two lines that narrow toward each other. The difference is the trade. A wedge trader waits for a breakout through the far line. A Wolfe wave trader enters earlier, at point 5 near the near line, and uses the line 1-4 as the target instead of the wedge’s height.
Number your next five swings with one fixed rule, then check point 5 against the close-confirmed levels in RelicusRoad Pro before you buy.
Written for RelicusRoad by RelicusDigital.com.
Keep going on this topic
Support and Resistance Mastery: Zones, Breaks and Retests
Master support and resistance zones with repeatable drawing rules, breakout and retest confirmation, invalidation, position sizing and common mistakes.
- Bump and Run Reversal Pattern: How to Trade It
- Island Reversal Pattern: How to Trade the Gap Trap
- Supply and Demand Zones: The Only Support & Resistance That Matters
- Candlestick patterns cheat sheet: bullish, bearish, neutral
- Bullish candlestick patterns: 9 that matter, ranked
- Supply and Demand Indicators: How to Read Zones Without Guessing
- Order Blocks vs. Supply Zones: Is there a Difference?
- Road Levels: The 'Smart Money' Map for High Probability Entries
- Action Levels Explained: How to Trade Institutional Price Zones
- Automated Support and Resistance Trading On Road Levels Without Guesswork
- Daily High/Low: The 'Kill Zone' Where Trends Go to Die
- Pivot Points: The Invisible Map of the Day
- Scalp Pivots Strategy: How to Catch 'Micro-Trends' for Quick Profit
- 5 Ways to Use Real-Time Scalp Pivots for Quick Forex Profits
- Murrey Math Lines: Do the 8/8 Levels Actually Hold?
- Trading Liquidity Zones: Where Institutions Actually Fill Their Orders